How to Set Up JMeter, InfluxDB, and Grafana Locally for Performance Monitoring
Introduction
When it comes to performance testing, it is not just about running the tests. It is also about understanding the results. That is where data visualization helps. Instead of working through raw numbers, dashboards help you view test results in real time and spot trends or issues quickly.
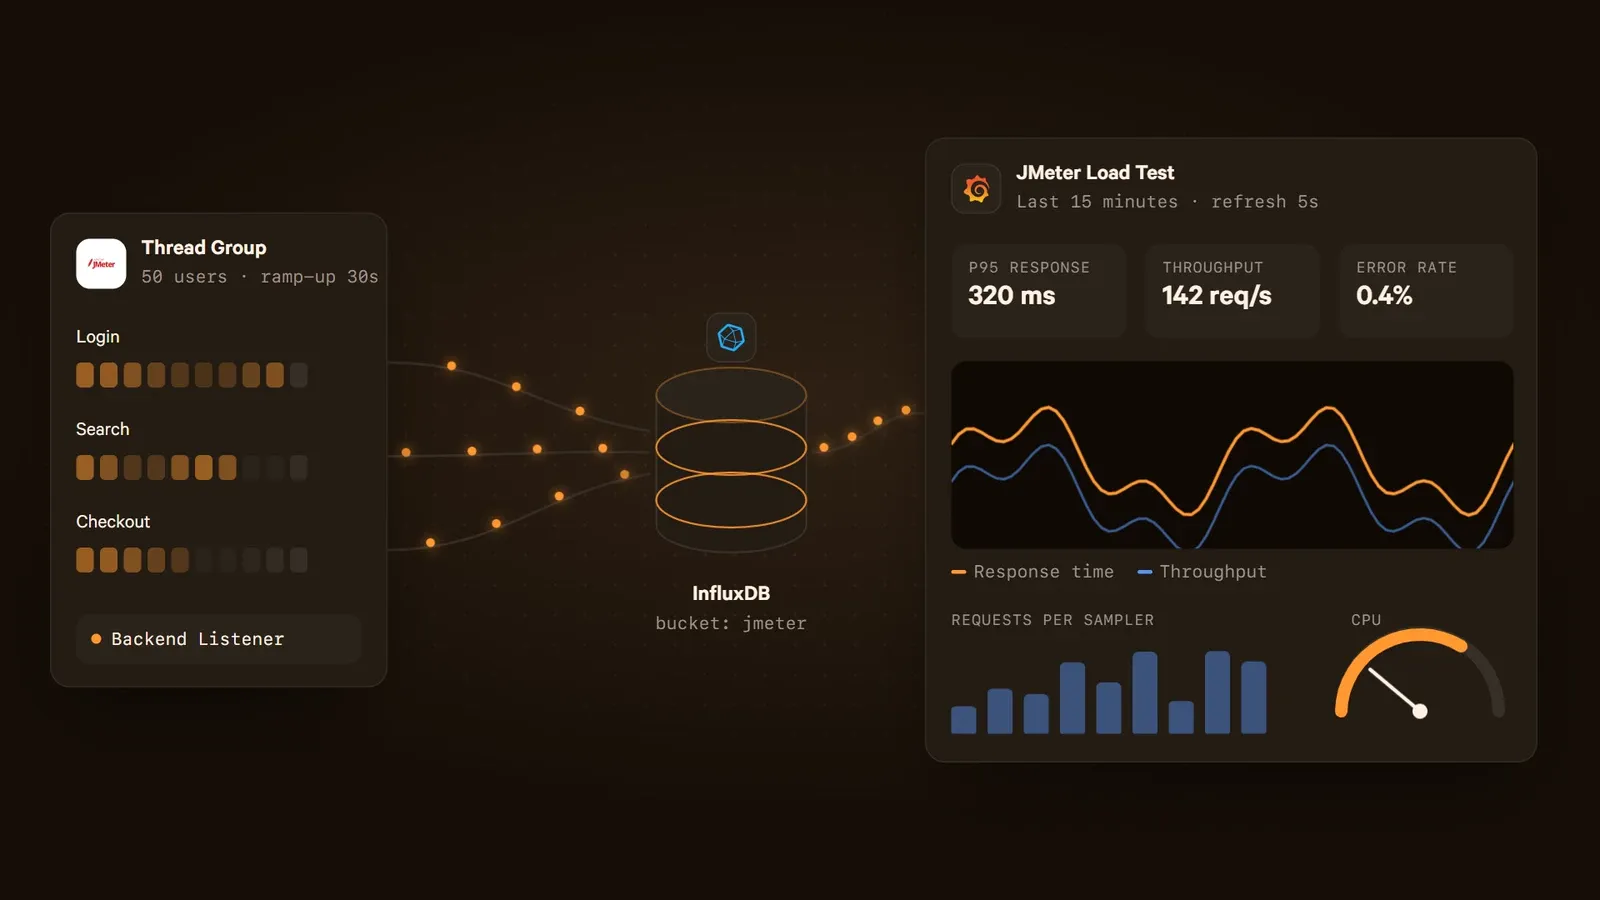
In this article, you will take JMeter performance test results and display them in a Grafana dashboard. To do that, InfluxDB is used as the database for storing test data, and Grafana is used to build interactive visualizations.
Whether you are new to performance testing or you want better reporting, these steps will help you set everything up locally. By the end, you will have a working setup to monitor and analyze your results.
1. Prerequisites
Before we start, make sure you have downloaded JMeter and you have a sample JMeter test script ready.
1.1 Installing JMeter and creating a test script
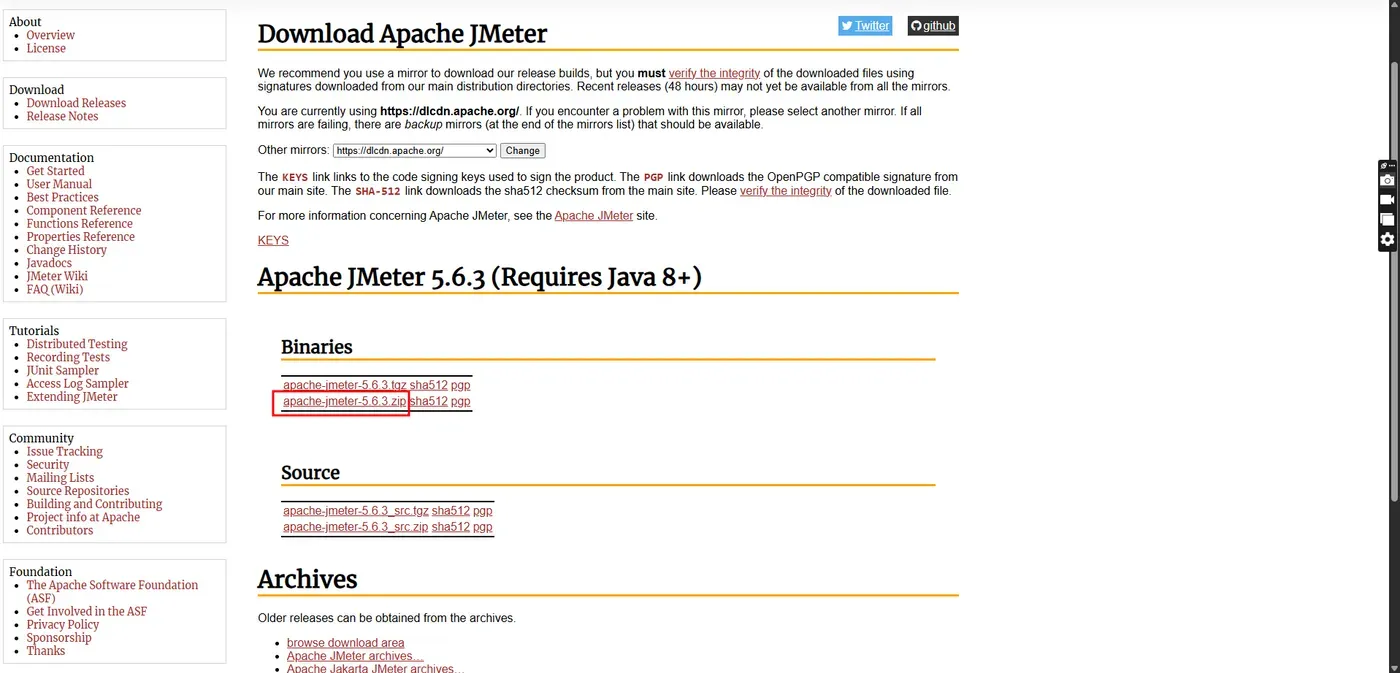
- Download JMeter and extract it to a location of your choice.
- Create a sample JMeter test script.
This GitHub repository contains sample test scripts for creating an employee in the OrangeHRM demo website .
2. Setting up the environment
2.1 Installing InfluxDB
- Go to the InfluxDB download page .
- Select the version and platform you want to download.
- Copy the installation command and execute it using PowerShell. It will download InfluxDB and install it in "C:\Program Files\InfluxData\influxdb\".
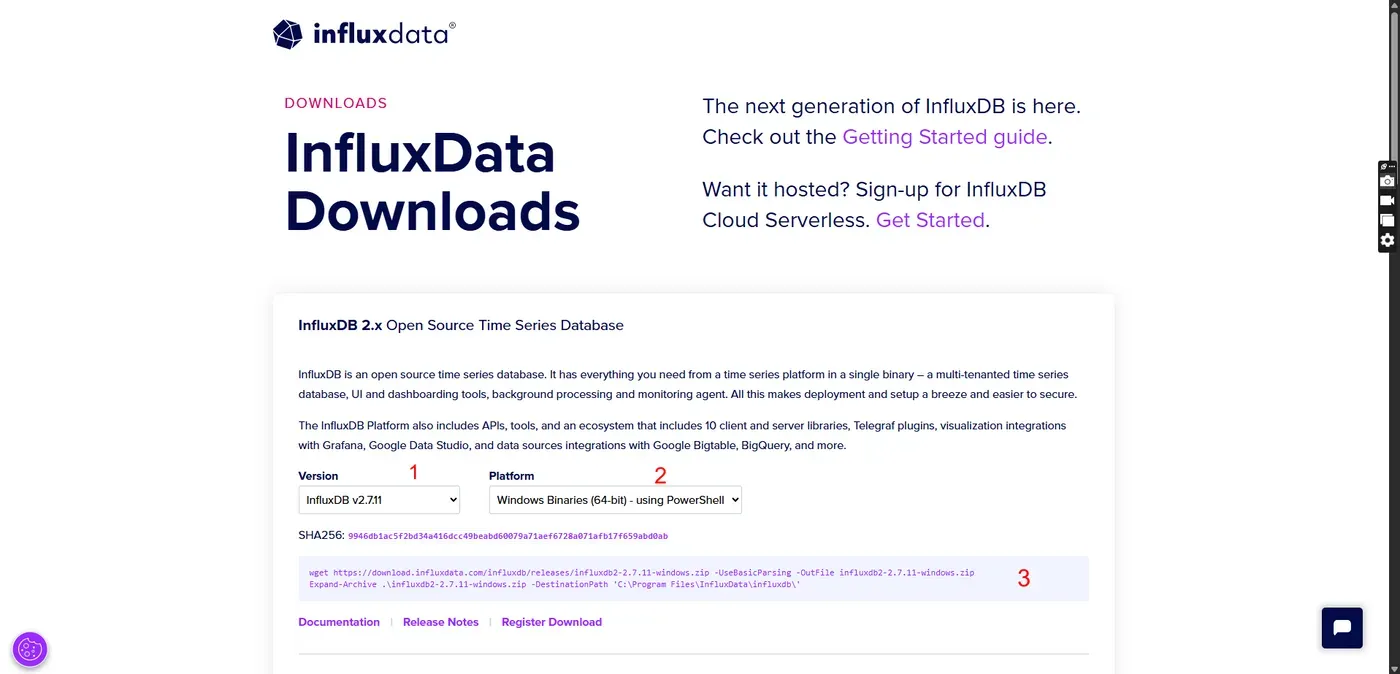
Or you can download separately and extract it to "C:\Program Files\InfluxData\".
- Go to the location where InfluxDB is extracted and run the executable using Command Prompt. Once it starts, it will display the port numbers for local access.
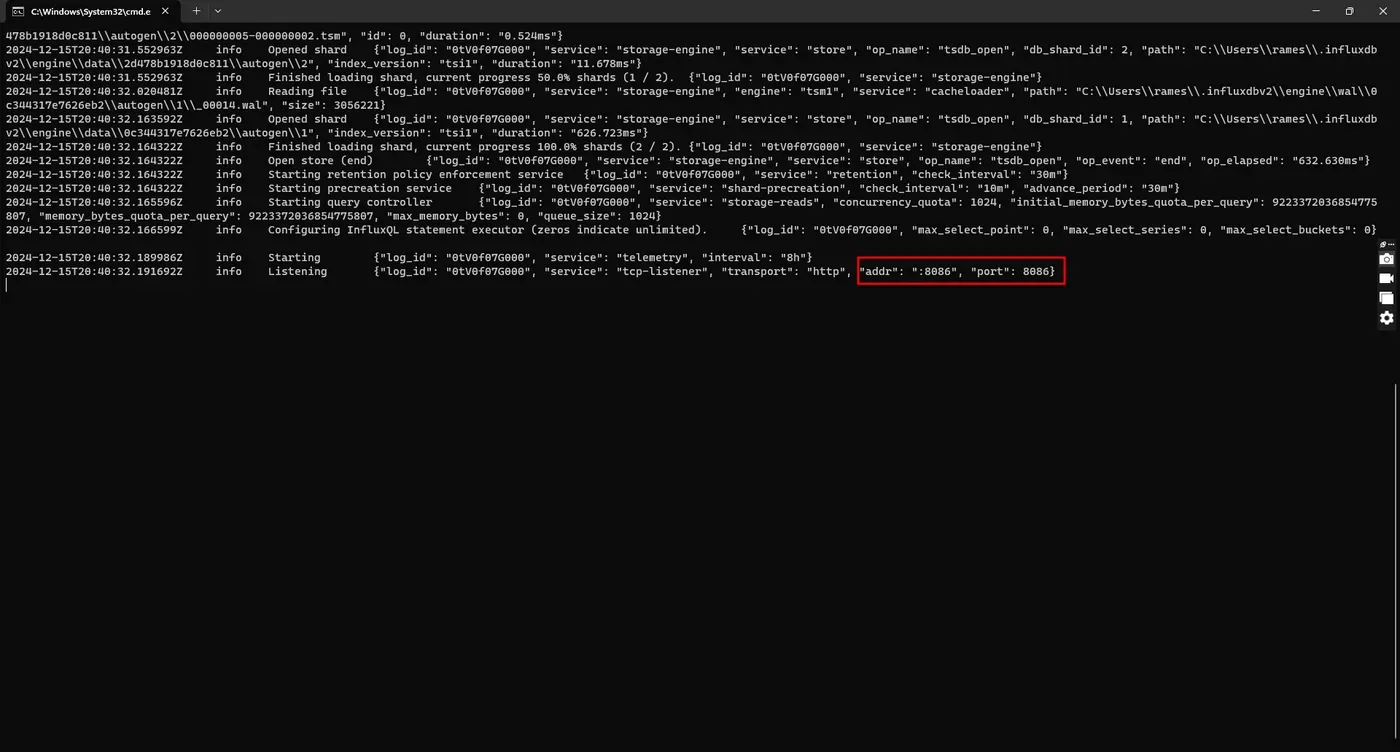
- Open your browser and navigate to http://localhost:8086 .
- If this is your first time opening the InfluxDB web interface, it will prompt you to create an initial user. After setup, an API token is generated (or you can create your own later). Store it securely for future use.
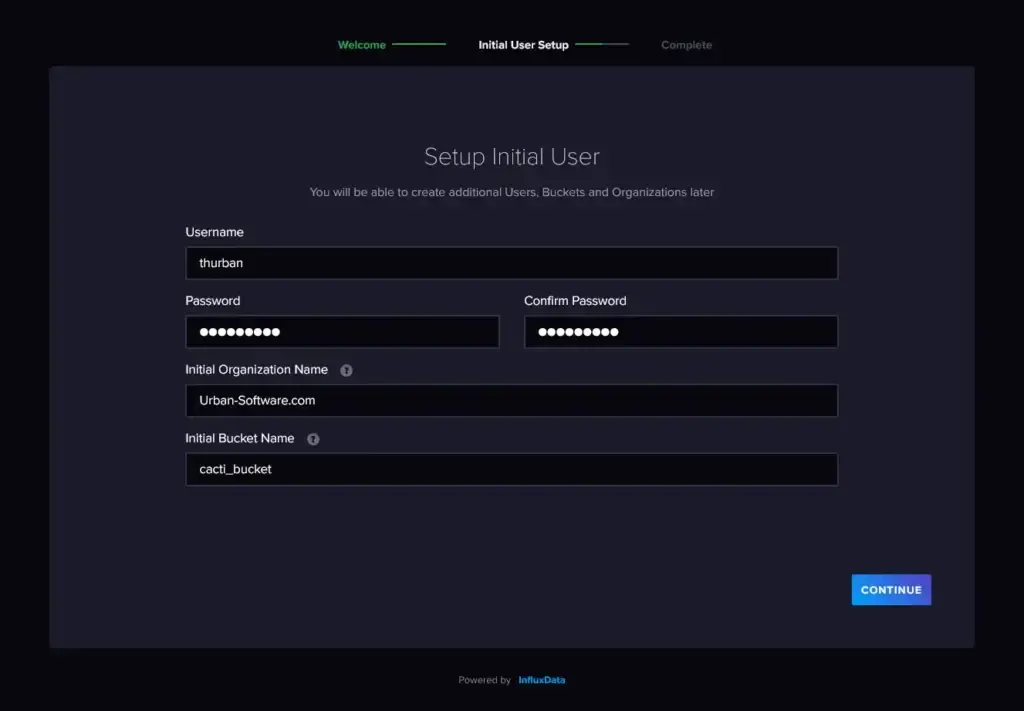
- After clicking Continue, you will be redirected to the final step. Click Quick Start to open the InfluxDB dashboard.
2.2 Installing Grafana
- Navigate to the Grafana Download page .
- Select the platform you want to download.
- Download the Grafana installer and install it.
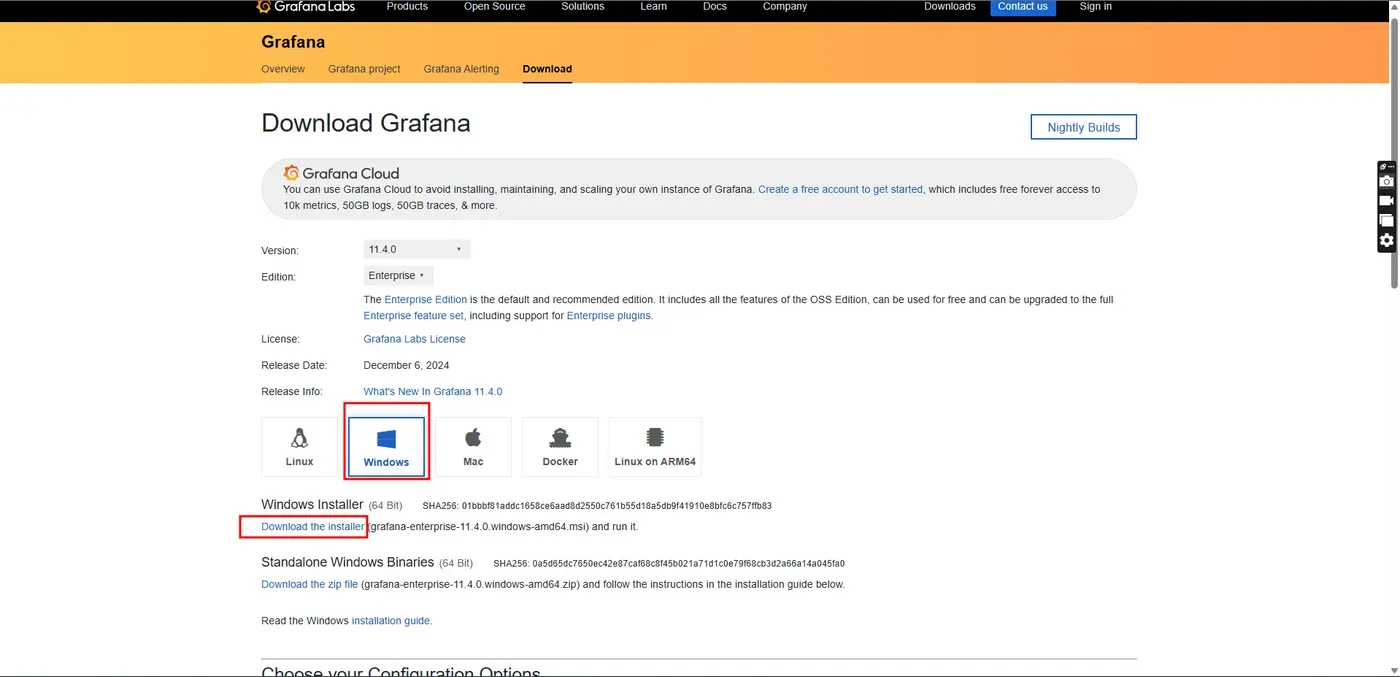
- After installation, Grafana will run as a service.
- Open your browser and navigate to http://localhost:3000 .
- Enter "admin" for both username and password.
- Click Login to navigate to the home page.
3. Configuring JMeter to Send Data to InfluxDB
- Open JMeter with a sample test script, or create a new test script.
Tip: If you are creating a new test script, use the BlazeMeter Auto Correlation Recording Plugin. It can identify dynamic values and handle them automatically.
- Add a Backend Listener to the Thread Group and configure it.
- Change the Backend Listener implementation to the third option in the list: "org.apache.jmeter.visualizers.backend.influxdb.InfluxdbBackendListenerClient".
- Update influxdbUrl to point to the InfluxDB Write API (POST http://localhost:8086/api/v2/write ).
- Provide the organization name and bucket name created during the InfluxDB setup as query parameters: http://localhost:8086/api/v2/write?org=[organization_name]&bucket=[bucket_name] .
- Example: http://localhost:8086/api/v2/write?org=JIG&bucket=jmeter .
- Add your API token as an additional parameter (from the InfluxDB initial setup).
- Click Add at the bottom of the Backend Listener to create a new field.
- In the new field, enter influxdbToken as the name (case-sensitive).
- Set the value to your API token and save.
- You can optionally change the application name and test title, but it is not mandatory.
- Run your test.
- Go to InfluxDB and navigate to Data Explorer.
- Select your bucket.
- Select jmeter under the measurement filter. If you changed the default measurement name in the Backend Listener, the updated name will appear here.
- The next field will show all the data being sent from JMeter to InfluxDB.
- Select the data you want to display and submit. InfluxDB will present the selected data as a graph.
What is happening here is: when you add a Backend Listener in JMeter and configure it with the InfluxDB API and token, JMeter sends performance metrics to InfluxDB during the test. InfluxDB stores this data, and you can later visualize it in tools like Grafana.
4. Setting Up Grafana to Visualize JMeter Data
4.1 Connecting Grafana to InfluxDB
- Navigate to Grafana.
- Go to Connections -> Data Sources and click Add New Data Source.
- Select InfluxDB as the data source.
- Select query language as Flux.
Flux is a data scripting and query language by InfluxData for InfluxDB 2.x. It is designed for time series data analysis and uses a functional approach with powerful operators and functions.
- Set the HTTP URL to the InfluxDB address (usually http://localhost:8086). If you are using Docker, use the container IP. For secured URLs, enable Basic Auth and provide the username and password.
- Under InfluxDB Details, provide your organization name, bucket name, and token.
- Click Save. If the connection is successful, a success message will appear.
After successfully connecting InfluxDB to Grafana, you can visualize the data stored in InfluxDB.
4.2 Create Custom Dashboards
- Navigate to Explore.
- Select your data source from the dropdown at the top of the screen.
- Click Sample Query and select Simple Query. This shows a basic Flux query that retrieves data from a specific measurement and field within the last hour from the selected bucket.
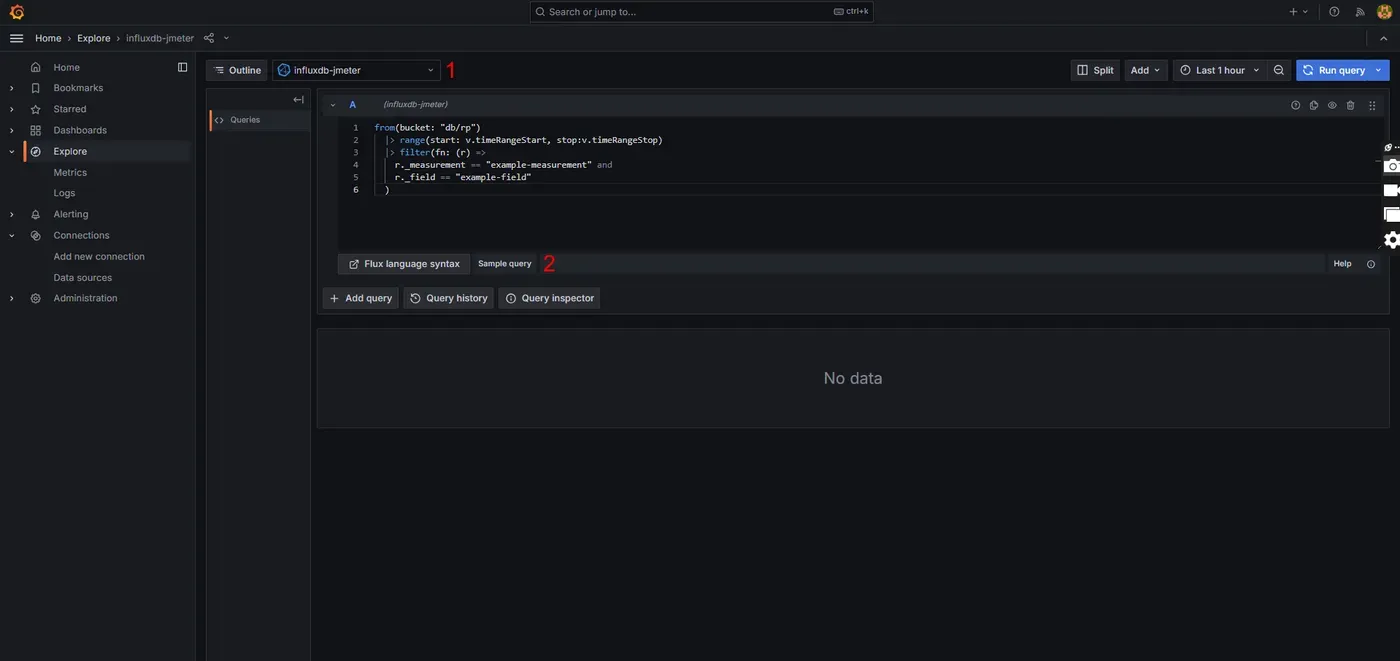
- Update the bucket name and measurement name (it should be jmeter if it was not modified in the JMeter Backend Listener), then select the field or fields you want to retrieve.
- After updating the query, run your test plan and then run the query. The selected field data will be displayed as a real-time graph.
- Save this graph to a dashboard by clicking Add to Dashboard. You can view saved dashboards on the dashboard screen and add more graphs to the same dashboard.
4.3 Create Dashboards Using Dashboard Templates
- Navigate to Grafana Dashboards .
- Select a dashboard to display JMeter performance metrics.
- Copy the dashboard ID or download the JSON file. You can import the dashboard using either option.
- Navigate back to Grafana.
- Go to Dashboards and click Import.
- Provide the dashboard ID or upload the JSON file, then click Load.
- Update the dashboard name and folder path (if applicable), select the data source, and click Import.
5. Summary
This article covered the basics of setting up a pipeline to visualize performance test data using JMeter, InfluxDB, and Grafana. While this is a foundational setup, it opens the door to useful insights by turning raw performance metrics into visual, actionable data.
Feel free to explore further by tweaking queries, adding more complex graphs, and customizing dashboards. Experimenting with Flux queries can help you create dashboards that match your needs.
In the next article, we can take this further with more advanced configurations. This is just the beginning. Stay curious and keep experimenting.
6. Reference
- https://grafana.com/grafana/dashboards/?search=jmeter
- https://grafana.com/docs/grafana/latest/getting-started/get-started-grafana-influxdb/
- https://jmeter.apache.org/usermanual/realtime-results.html
- https://docs.influxdata.com/flux/v0/get-started/